When looking back at the projects I completed in 2024, this one stands out. I call it my “AI-inspired” work desk. I refer to it as “AI-inspired” because the majority of AI-generated images I liked were filled with completely unnecessary design details, some of which didn’t even make sense. However, as a side effect, these details kept the viewer’s eyes engaged, and I appreciated the extra time spent observing the craft as a result. I decided to kick it off with I-beams as the main construction material. This was definitely overkill from an engineering point of view, but it was the starting point and the key feature of the design language. Next came a number of design and functional challenges I had or wanted to implement.
Design Challenge #1
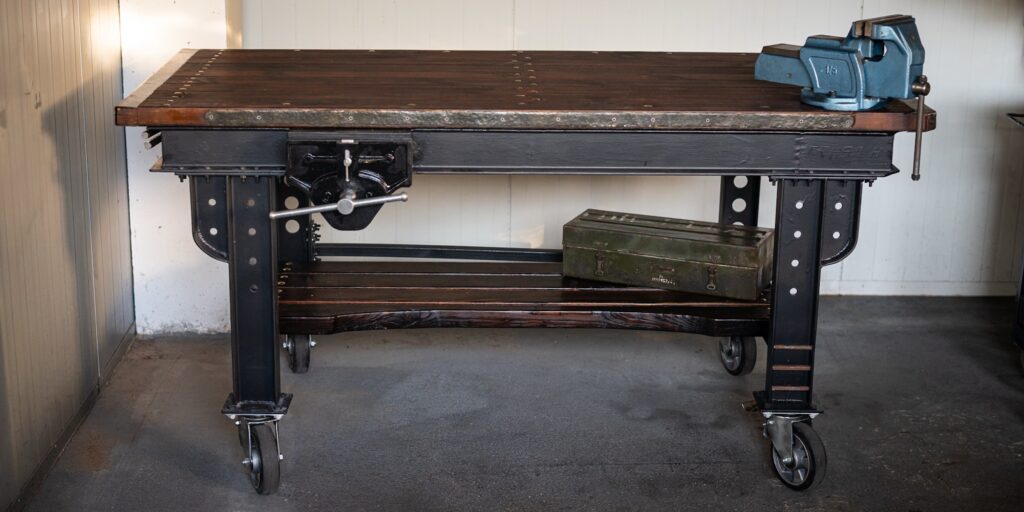
Since I rent the space for my workshop, the work desk had to not only be moveable within the workshop but also transportable in case I had to move the entire workshop. This was the first design challenge: a sturdy work desk that could be dismounted. Four casters on each leg, each capable of supporting 400 kg, and many bolts to attach the legs to the base primarily addressed this challenge. The countertop is removable, as are the vices. The desk measures 90 cm in width and 200 cm in length and is definitely heavy. 100 mm I-beams ensured sturdiness.
Design Challenge #2
This challenge, or rather group of challenges, was function-related. Obviously, being a work desk, it had to be functional. As I do both metal and woodwork, I wanted to combine the best of both worlds and have a desk with both woodworking and metalwork vices installed. The latter is fixed at a 45-degree angle for easier access from both sides, which is useful when filing and such. Hence, one cut-out corner. Woodworking vice weights 18 kg alone and has the clamping width of 395 mm – very useful feature to have. It is mounted on the custom made 10 mm steel plate.
Choosing the countertop wasn’t straightforward, especially when it came to being suitable for wood, metal, and general-purpose work. Wooden countertops have the benefit of impact absorption (useful when chiseling) but are too soft and not flat, so not suitable for metal fabrication work. I decided to stick to wood, as making a 90×200 cm metal countertop thick enough to be suitable for welding (at least 10 mm, preferably more) would have meant well over 1 ton of metal weight. Compromising on size when the space allows is a crime, and drilling dog holes for both weight reduction and added function would have been a nightmare, not to mention my lack of confidence in drilling them sufficiently aligned. The challenge of achieving decent flatness and managing constant heat distortions to maintain it was another con for me.
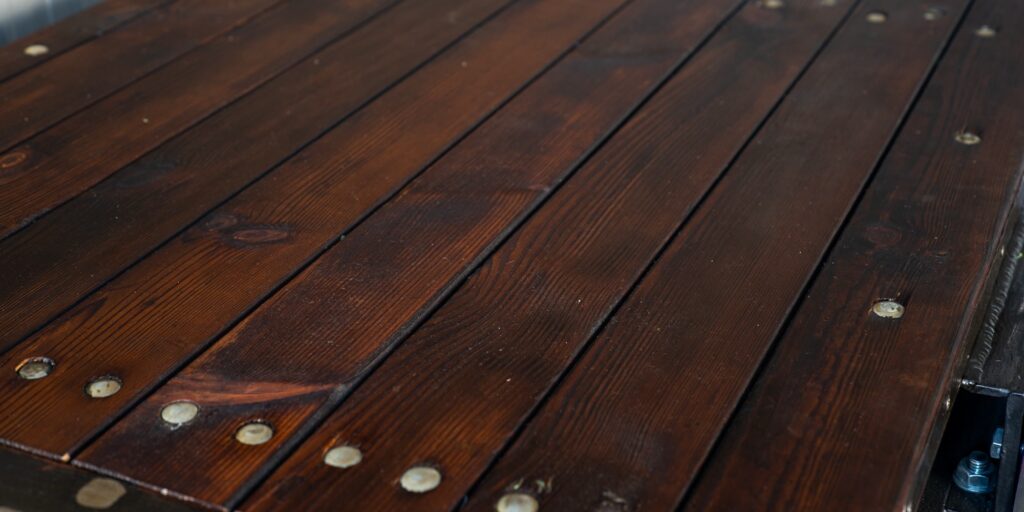
As I got rid of the need for flatness, I ended up with horizontally mounted 5 cm wood planks, which I could replace one by one if needed. This was before I installed metal C-channels at the ends, which we’ll get to later. I left minimal gaps in between the planks for the wood to move and attached the planks using counter-drilled carriage bolts. The metal I-beam base has the same 100 mm I-beam metal cross-section in the middle and two vertically mounted 10 cm width wooden cross-sections, which combined account for a maximum of ~30 cm between the fixing points. The result is a sturdy yet impact-absorbing countertop of manageable weight, compliant with the first design challenge above. It is stained and oiled for a weathered vintage look, so are the heads of the carriage bolts.
Whenever working on smaller items, a leather hide laid on top of any countertop comes in handy, so I don’t mind the gaps between the planks.
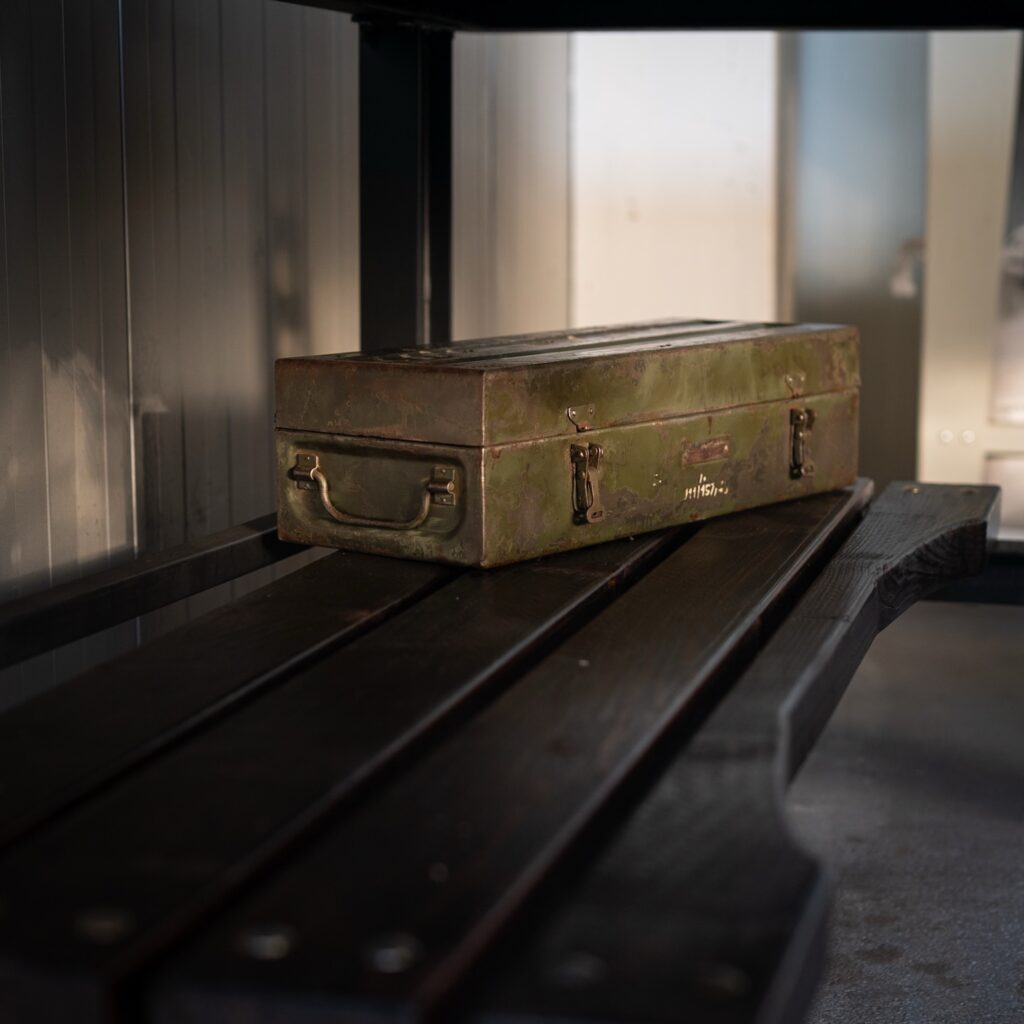
The lower floor section adds some horizontal space, which is always useful in the workshop. Plus, it’s convenient for resting your legs when sitting. The cut-out is purely for design aesthetics. Softwood is used here. Functionally, it probably braces the legs somewhat, but I’m not sure they need it, and that’s not its primary function.
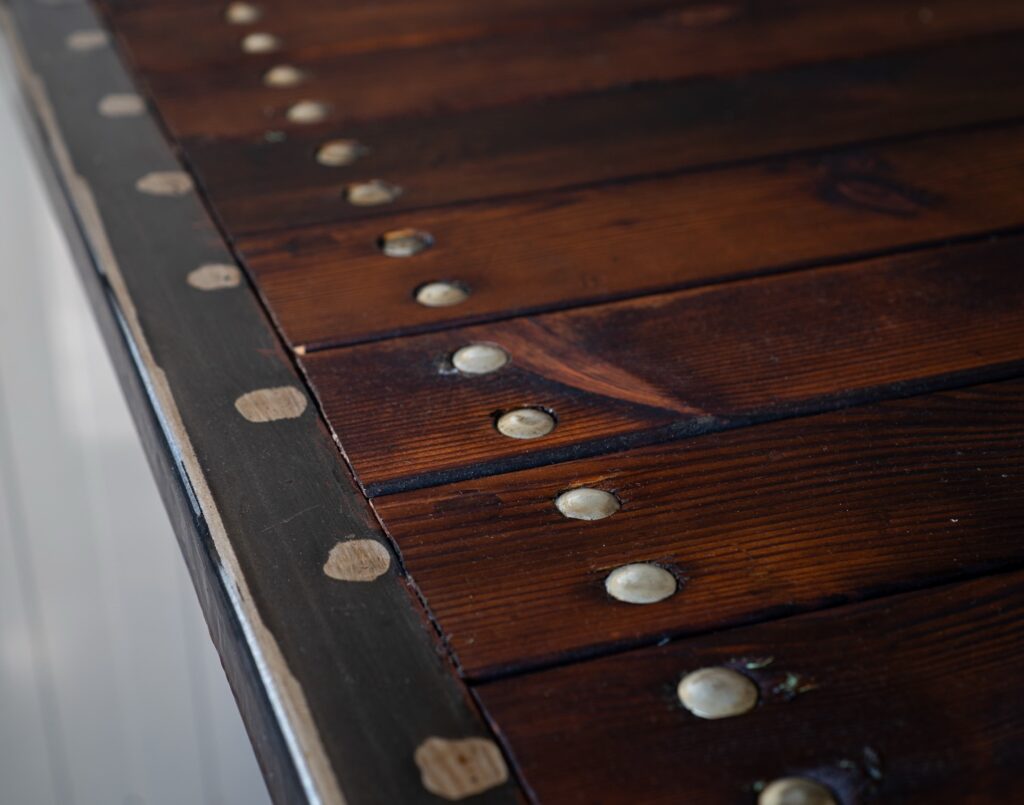
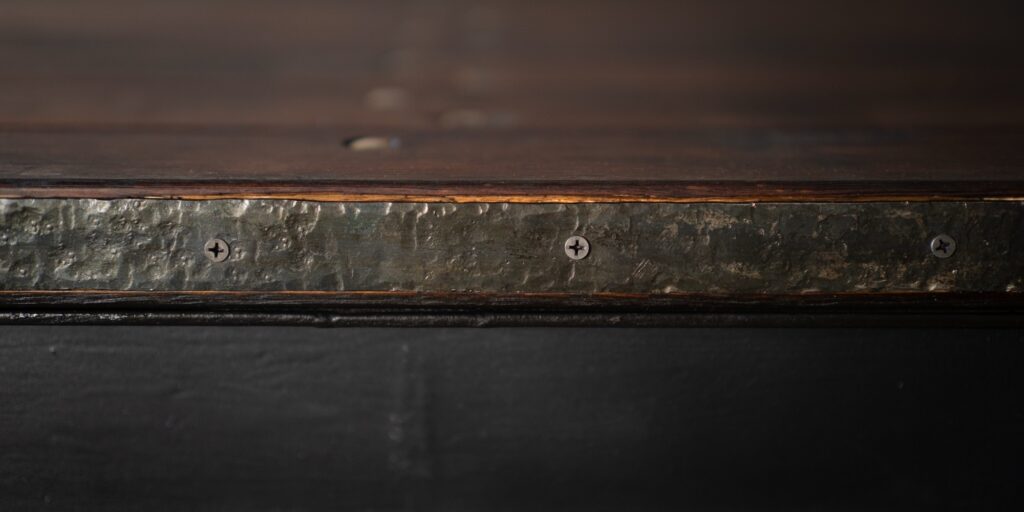
The metal C-channels at the ends of the countertop serve a few functions, mainly as hard fixing points for clamping items. I can also attach a clamp to use as a stop to hold a board when planing. They do a good job of hiding the end grain of the wood and preventing accidental splitting. I encountered two unexpected aspects related to these. First, the size. I knew I wanted the C-channels to sit chiseled in and flush with the wood, and obviously, such exact depth measurements don’t exist. This meant buying larger depth diameter C-channels, cutting them lengthwise, grinding, and welding them back together. Second, fixing them onto the wood well enough to withstand multidirectional forces. I ended up drilling through holes, inserting large 5mm nails bottom up, welding them into the top flange, and grinding flat. Welding a 2 mm thick flange with the smell of burning wood underneath was fun. The fixation is very strong, but I don’t have a plan for how I’d remove them if needed. Finish wise, I went with the ‘trendy visible grind’ finish just for the sake of exposing the element and sealed it with epoxy lacquer.
Design Challenge #3
Clearly, going easy and efficient weren’t the goals of this project, so I was completely fine with dedicating more time to the design details. This aspect is definitely not rational, but I find it plays a key role in the overall end design and, as mentioned, keeps the viewer’s eye busy for longer. To name a few:
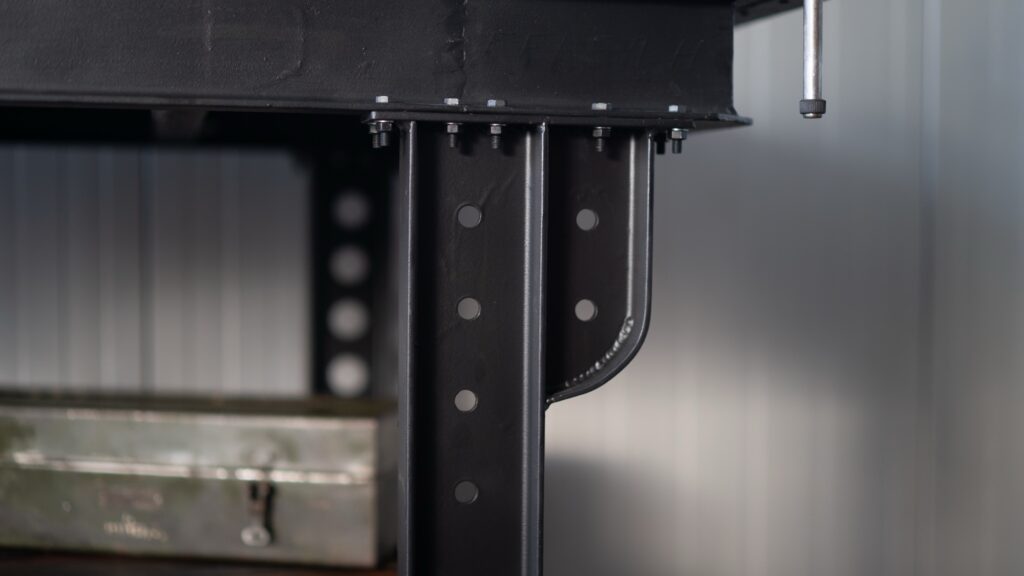
Pillared front legs. I love how proportionate these look. Lots of cutting, grinding, hot bending, hammering, welding, and grinding again.
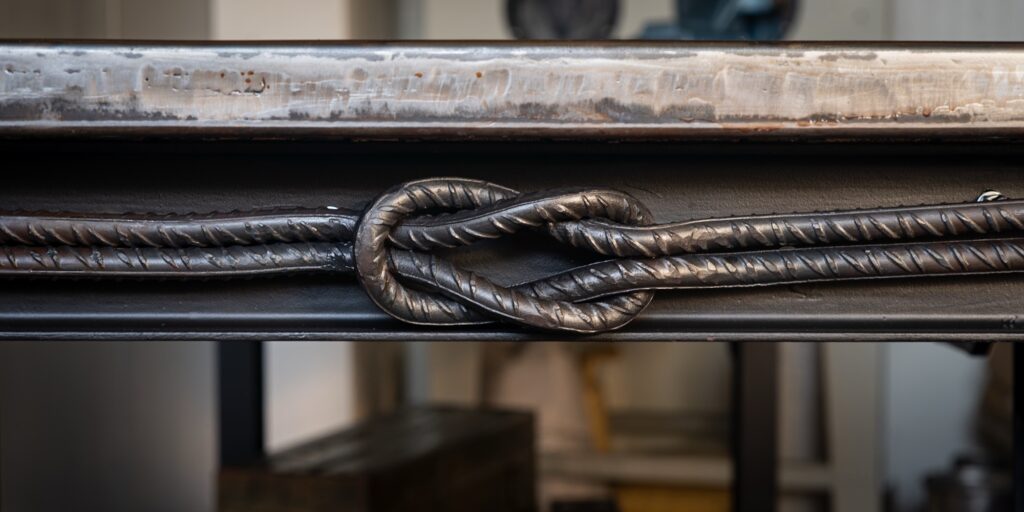
he forged square knot is the highlight in my view, fixed to the left side of the desk—visible from the entrance to the workshop. I attached it to the I-beam so that it looks like it’s floating. It’s relatively big: 2 meters of rebar went into it.
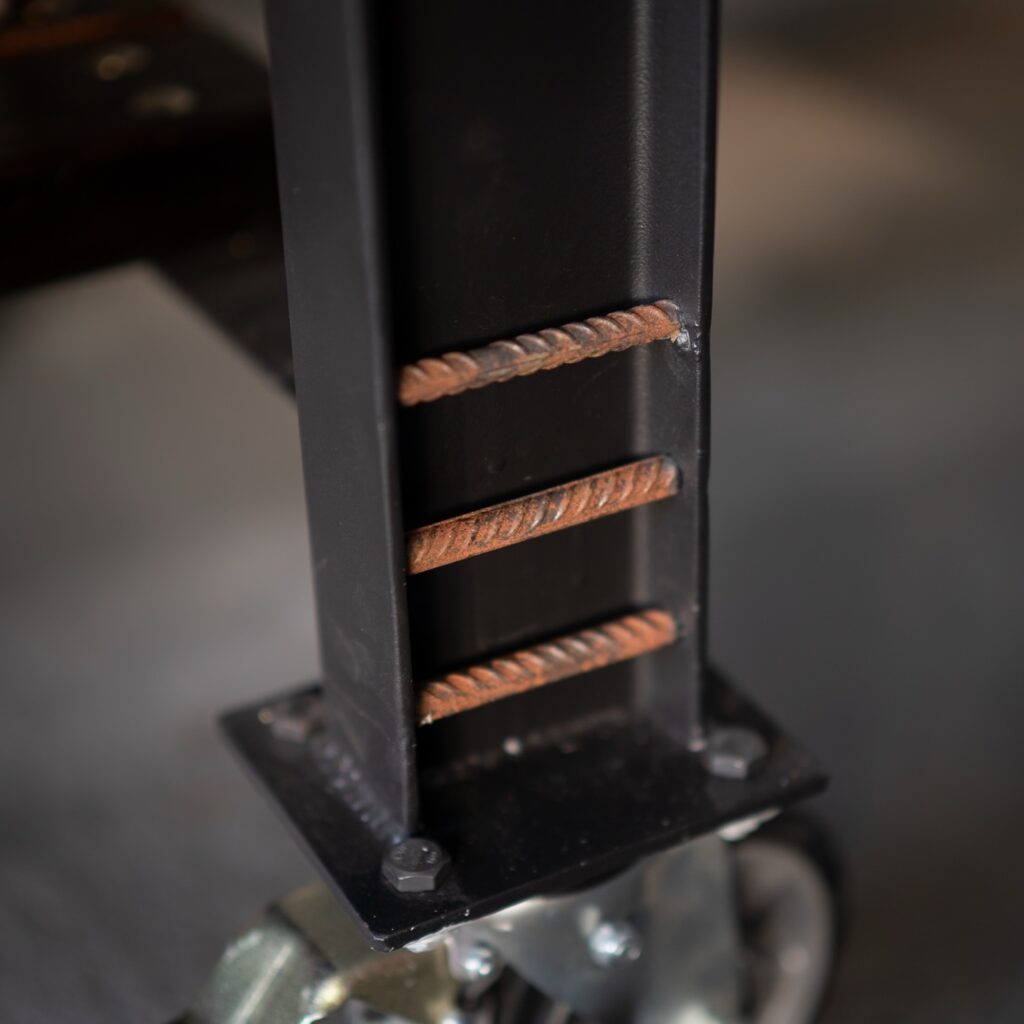
Three pieces of rusted rebar installed on the left leg. I liked the idea of them simply sitting there God knows how they’d gotten here or why. They’re installed completely visually seamlessly and the rust was protected throughout the project. Completely functionally purposeless items.
Forged and rounded ends of a steel flat bar across almost the full length of the desk on the face of the countertop. Admittedly, the chisel work could have been better here. Next time, I would work on it at an earlier stage while clamping is easier.

Large drilled holes in all four legs add visual lightness to the otherwise heavy look.
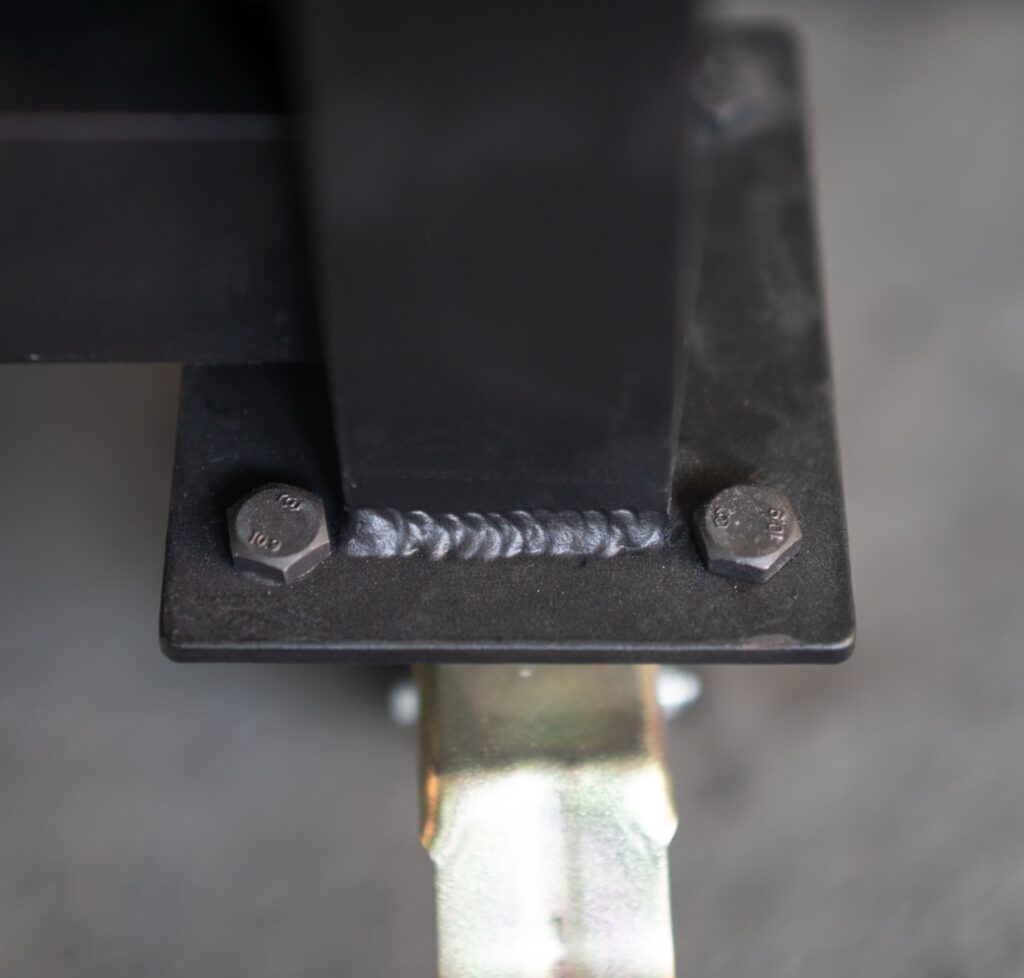
Exposed welding seams are the benefits of TIG welding, so they stayed.
Black oxide fasteners, the number of which obviously exceeds engineering needs, definitely speak ‘AI’ to me.
I’m pleased with how this all turned out. It’s not perfect and was never intended to be. I’m keeping it to be abused while also being nice to look at. A spot-on combination to my liking.
Leave a Reply